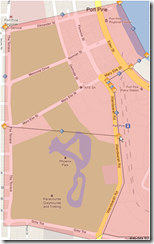
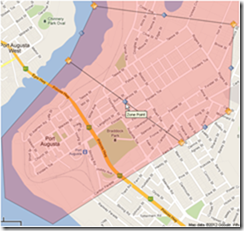
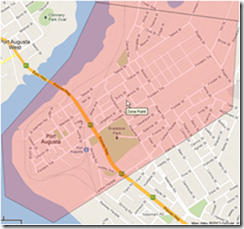
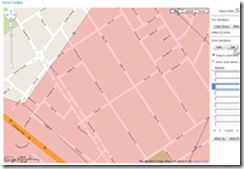
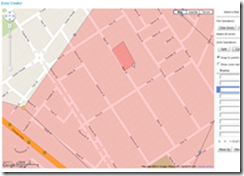
The zone editing tool is used to create or to modify specific map areas called zones. These zones are used by the fleet and SmartMove as part of the dispatch algorithm to distribute bookings. Plan the zones carefully to ensure that they make sense to both the operators and drivers of the fleet. This will help to optimise your customers’ experience.
Google Chrome Browser
When editing zones, we recommend using the latest version of the Google Chrome browser (http://www.google.com/chrome) since other browsers may not be fully compatible with Google Maps and the zone editing software.
Google Maps
Google Maps (http://maps.google.com) is a mapping service which allows users to view maps (streets and satellite views) from all around the world. Google Maps will be used to help define the zones in the fleet’s area of operation. It is advisable that you familiarise yourself with Google Maps before proceeding with creating zones.
Locate the area of operation
Type the region that your fleet operates into the search box and click the Search Maps (![]() ) button.
) button.
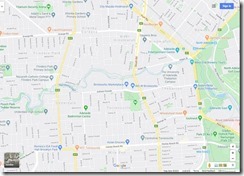
In this example, the suburb of Plympton in South Australia will be used. Google Maps locates and zooms into the region.
Panning
Panning means moving from side to side, or up and down. You are able to pan around the different areas of a map. Simply press and hold the left mouse button and move the mouse in the direction you would like to move the map while continuing to hold the left mouse button.
Zooming
Zooming changes how much of the map you can see at once. As you zoom in closer, you will see a more detailed view (individual streets, even individual properties). There are 3 ways of zooming:
A. Using the zoom buttons in the bottom right of the map.
![]()
B. Once you are confident with navigating around the map, the mouse can be used to zoom in quickly by double clicking the left mouse button at the point that you want to zoom in on; this will zoom in one level.
C. If you have a mouse with a scroll wheel, you can scroll up/down to zoom in/out.
Map detail
You can view Google Maps in satellite or map view. By default Google Maps displays the map view showing streets and natural features as basic vectors. Satellite view shows the map using aerial photos which might be useful when trying to locate a particular landmark. Note that both views may show out-dated data. Change between these views by clicking on the buttons on the top right of the map.
Note: It is recommended that you make the window as large as possible on your screen to make working with the maps as easy as possible.
Creating zones
It is recommended that you start your first zone in the middle of your fleet’s area of operation then work outwards. This generally means defining the CBD as the first zone.
When creating your zone, use natural boundaries as the border to your zone (creeks, train lines etc.) to help create a segment where getting from any point in that zone to any other point in that zone is relatively quick. Be sure to consider where your ranks are, it is ideal to have a commonly used rank within the CBD.
Load the zone editor tool
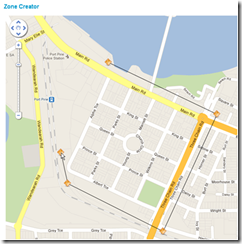
1. Log into the Fleet Management Website and select the Zone Editor menu item. The Zone Editor tool will be displayed:
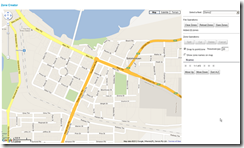
Ensure your fleet is displayed in the Select a Fleet dropdown list.
Adding a zone
1. Pan and Zoom the map so that you can easily see the individual street names in the area that you wish to create a zone. This will help you to create an accurate zone.
2. Click on the map to start creating a zone. Continue to select points around the area; you will notice the points (vertices) being joined and a shape being created as you continue to click. Take note of the following:
- Use a distant point to create a straight line between them, or more frequent point to follow the contour of a boundary or street.
- Ensure that a boundary never runs down the middle/centre of a street, a street must always be in one zone or the other. This means you should run the boundary along one edge of the road, or directly through the centre of a block or river.
- Make it obvious which side of the road you would like the boundary on.
Note: In this example, the train track was used as a natural boundary and the zone included the whole of Three Chain Rd, not just the middle of the street.
3. When you have completed the shape, click on the first vertex to complete the shape.
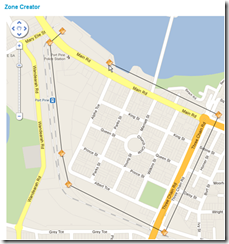
This will create a zone. You will need to give the zone a name. In this example, the zone was named CBD.
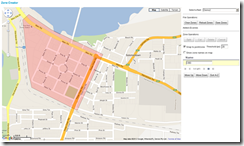
Note: Ensure that you use capital letters when naming a zone and use meaningful zone names which will help both operators and drivers learn the zone names (e.g.. WOOLWORTHS, as a name for the zone around the Woolworths shopping complex).
During the zone creation you can still pan and zoom as required to design the zone.
Modifying a zone
1. You can move the zone boundaries by dragging the big yellow vertex ![]() . To add more vertices, click on the zone to select it. Drag the smaller purple vertex
. To add more vertices, click on the zone to select it. Drag the smaller purple vertex ![]() . Adding more vertices will allow you to follow boundaries more precisely.
. Adding more vertices will allow you to follow boundaries more precisely. 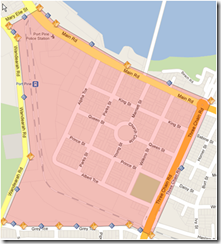
Snapping to boundaries of adjacent zones
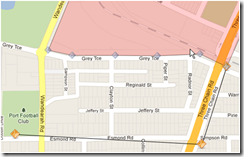
1. When adding a zone adjacent to another zone you need to follow the existing boundary of the adjacent zone. In this case, you will snap to the vertices of the zone that you are modifying/adding to the vertices of the adjacent zone.
2. To snap a vertex of an adjacent zone, hover the mouse over the adjacent zone to reveal the vertices of the adjacent zone that can be snapped to.
3. Click on one of those vertices to snap to that vertex.
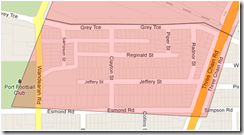
Note: You can only snap to a big yellow vertex.
Note: Avoid leaving blank space between the zones even if it is wasteland or swamp etc. Developments are happening all the time and it is good to have these areas included in a zone.
Deleting vertices
1. To delete a vertex, simply click on the zone that you need to delete the vertex.
2. Press the Delete button. The button’s label will be shown in bold to highlight that the Editor is in Delete mode.
3. Click on the vertex to delete it. If a vertex cannot be deleted, the Zone Editor tool will tell you.
Deleting zones
1. A whole zone can be deleted. To delete a zone, click on the zone that you want to delete.
2. Press the Delete button. The button’s label will be shown in bold to highlight that the editor is in deletion mode.
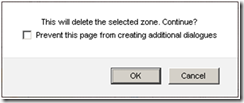
3. Click on the zone again to delete it. A dialogue box will be displayed asking for confirmation. Press either OK to confirm or Cancel to dismiss the dialogue box.
Splitting zones
1. A zone can be split into two smaller zones. The split will occur between the two vertices that are selected. The vertices can be either the big yellow vertex or the small purple vertex.
2. To split a zone, click on the zone that you want to split.
3. Press the Split button. The button’s label will be shown in bold to highlight that the Editor is in splitting mode.
4. Click on the two first vertex then click on the second vertex. The split will occur between those two vertices.
Combining zones
1. To combine two zones, there has to be only one small purple vertex ![]() separating the two zones.
separating the two zones.
2. To combine two zones, click on one of the zones that you want to combine.
3. Press the Delete button. The button’s label will be shown in bold to highlight that the editor is in delete mode.
4. Click on the small purple vertex that is separating the two zones. The line separating the two zones should disappear and the two zones should become one.
Cutting zones
1. Sometimes, it may be necessary to create a small zone within a larger zone. A typical example is when you need to have a small rank zone within the larger CBD zone. We use the term “cutting” to describe the process where a shape is cut-out of another zone and a new zone is created assuming that cut out shape.
2. To cut a zone, select the larger zone.
3. Press the Cut button. The button’s label will be shown in bold to highlight that the editor is in cutting mode.
4. Start clicking/adding vertices within the larger zone as if you were creating a new zone.
Saving
To save your work, press the Save Zones button. Remember to save regularly.
Continue to add zones, ensuring that ALL areas within the fleet’s regular operating area are covered by a zone. It is ideal to have smaller zones in the central busier areas to improve response times, and then increase the size of the zones as you expand out into the regional and farming areas. The zones can be whatever shape is required.
Once you have finished adding all the zones, save your work prior to exiting.


![clip_image030[1] clip_image030[1]](http://smhelp.smartmovetaxis.com/wp-content/uploads/2020/06/clip_image0301_thumb.png)

