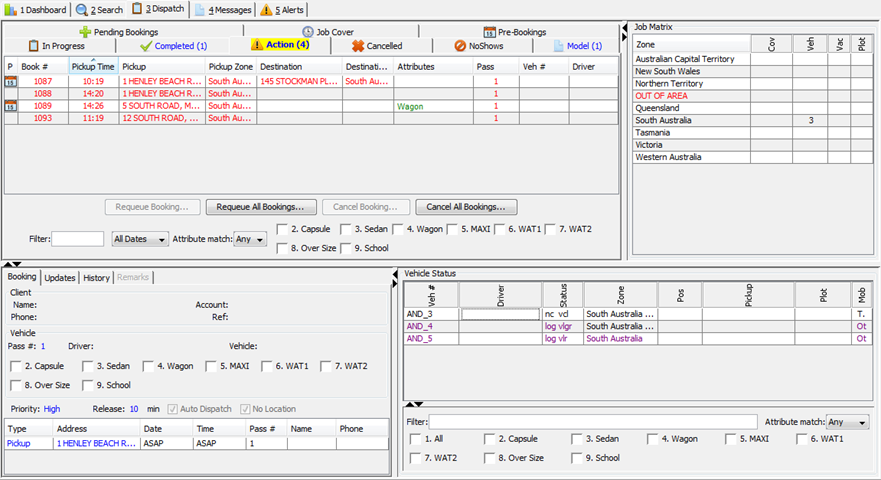
In the dispatch tab, the Operator can view the instantaneous status of all jobs and vehicles in the selected fleet.
This screen is divided four main areas. Each of these sections are described in more detail below.
Jobs List
This area contains a series of tabs, currently nine, representing jobs in different states. If there are jobs in a particular state, the number of jobs will be displayed in parenthesis and displayed in the table under that tab. The colour of the tab can change to be highlighted (yellow of blue) if there is something that should have some attention.
All of the tabs other than the pending bookings tab has a filter below it that will allow the jobs that are displayed in each list to be filtered.
- The filter field will allow a string to be entered. This will cause only the jobs where one of the columns contains the string entered to be displayed
- The dates field allows a quick date filter to be applied to the list of bookings
- A list of the booking attributes available are shown in rows with checkboxes next to them. If the attributes are checked
![image_thumb[11] image_thumb[11]](http://smhelp.smartmovetaxis.com/wp-content/uploads/2012/06/image_thumb11_thumb.png) the list will only contain bookings that have those attributes. If the attributes have a cross
the list will only contain bookings that have those attributes. If the attributes have a cross ![image_thumb[13] image_thumb[13]](http://smhelp.smartmovetaxis.com/wp-content/uploads/2012/06/image_thumb13_thumb.png) in them the list will contain bookings that were marked as “NOT” that attribute. The drop down “Match” indicates whether the search should use “any” of the attributes or “all” of the attributes.
in them the list will contain bookings that were marked as “NOT” that attribute. The drop down “Match” indicates whether the search should use “any” of the attributes or “all” of the attributes.
Each of the tabs in the jobs list section is described in more details below:
 Pending Bookings
The pending bookings tab contains a table which lists all the bookings entered by the Operator but have not been put into the In Progress queue in readiness for dispatch. This could be caused by server issues or interruption of the internet connection from the dispatch client to the server. This functionality is provided so that bookings can still be entered and edited by the Operator while the server connection is down, hence allowing the fleet to continue operating in a reduced capacity (i.e. bookings will not be dispatched but they can be tracked)
The pending bookings table on this tab has the same description and available actions as the pending bookings table on the dashboard panel and that documentation should be referred to for more information.
 Job Cover
All jobs that are on cover are placed in the Job Cover table. A job will be on cover if it can not be automatically dispatched to vacant eligible Vehicles from the use of zone/layering algorithms. Jobs on cover will be offered to vacant eligible Vehicles if the job is within the Vehicle’s cover radius. If no vacant eligible vehicles are found, the job will sit in the cover queue until one can be found.
As soon as a job is placed in the Job Cover table, the Job Cover tab will show the number of jobs on cover in parenthesis.
The table consists of 19 columns. Due to limited space, some column headings are abbreviated. These are described below:
- Q: Indicates that this is a queued booking
- P: This indicates whether the booking is a pre booking or not. If it is it will show a
 icon and if it is an ASAP booking it will be blank
- Book #: shows the booking number of the job.
- Pickup Time: The pickup time requested fro the booking or the time the booking was created for ASAP bookings
- In Queue: shows the length of time a job has been in the queue. If a pre-booking is placed in the job cover queue, the time will have a negative value meaning the Client is not due to be picked up for that amount of time.
- Pickup: shows the address of the pickup location.
- Pickup Zone: shows the zone the job is located. If a zone could not be automatically be determined (e.g. out of town job) and was not be manually specified, this field will be blank.
- Destination: shows the address of the destination location, if one was specified.
- Destination Zone: shows the zone of the destination location, if one was specified.
- Attributes: shows what attributes the Vehicle must have to service the job, e.g. WAT, MAXI.
- Status: shows the status of the job. These can be:
- QUEUED: the job is queued to be dispatched to the next vacant eligible Vehicle.
- MANUAL: some constraints have been placed on the job, e.g. it has been manually dispatched to a particular Driver or Vehicle.
- CLOSEST: the job has “no location” specified. That is, the job will be dispatched to the closest Vehicle.
- OFFERED: the job has been offered to a Driver and is waiting for a response.
- Pass: shows the number of passengers the Client specified for the booking.
- Veh #: shows the Vehicle number that the job will be manually dispatched to, if applicable.
- Driver: shows the Driver that the job will be manually dispatched to, if applicable.
- Account: The account specified for this booking if one was set.
- Set Fare: The fixed fare amount specified for this booking if one was set.
- Ref #: The account reference number specified for this booking if one was set.
- Client Name: The client name specified for this booking if one was set.
- Client Phone: The client phone number specified for this booking if one was set.
The columns can be sorted in ascending/descending order by clicking the column header. Clicking it a second time will sort the column in the reverse order
The entries in the table will be highlighted in different colours depending on the length of time the job has been in the queue:
|
Time in queue |
Colour |
Comments |
|
-ve |
Dark cyan |
No highlighting will be applied when job is being offered. |
|
0 – 5 min |
Blue |
|
|
5 – 10 min |
Dark pink |
|
|
>10 |
Red |
The following sections describe the buttons that are below the job cover table.
Auto Dispatch
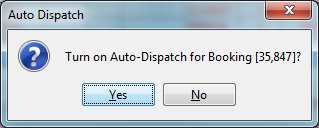
If a job has been set not to auto dispatch and it is selected in the job cover list the “Auto Dispatch” button will be enabled. Clicking this will bring up a confirmation dialog to ask if you are sure that you want to turn on auto-dispatch for that booking
Manual Dispatch
The Operator is able to manually dispatch a job that’s on cover by selecting an entry in the Job Cover table then either pressing the Manual Dispatch button or right-clicking on the entry then selecting the Manual Dispatch menu item. Cases when this may occur is a “volunteer” job.
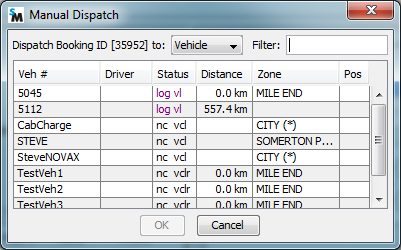
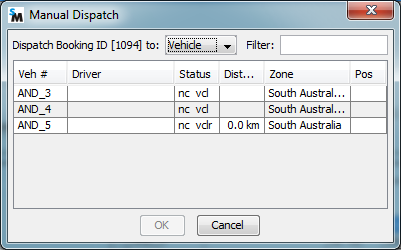
The Manual Dispatch dialogue will be displayed. This dialog shows a small table with a list of vehicles and some useful information on those vehicles. The information can be used to help deciding which vehicle to manually allocate the booking to. The table can also be used to show a list of drivers so that the booking can be allocated to a driver instead. Note that only drivers currently logged in will be shown in the driver list.
For jobs with specific criteria, only Vehicles that satisfy that criteria will be listed, e.g. for WAT jobs, only WAT Vehicles will be listed. Press OK to dispatch the job manually to the selected Vehicle or press Cancel to dismiss the dialogue box.
Note: if the Vehicle is flagged as Unavailable or no Driver is logged into the Vehicle at the time the job was manually dispatched to it, the job will be offered to the closest Vehicle to the job (i.e. “no location check” will apply) and the status of that job will change to CLOSEST. If the Vehicle becomes Available again or a Driver logs in and the job is still in on cover, the job will be offered to that Vehicle again.
Clear Manual Dispatch
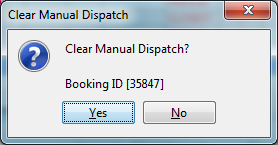
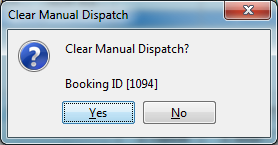
Sometimes a manually dispatched job may need to be cancelled, e.g. the Driver that accepted the job had an accident and can no longer do the job. The Operator is able to clear manually dispatched jobs by selecting an entry in the Job Cover table then either pressing the Clear Manual Dispatch button or right-clicking on the entry then selecting the Clear Manual Dispatch menu item. The Clear Manual Dispatch dialogue will be displayed.
The Operator can press Yes to cancel the manually dispatched job, which will put that job back onto the cover queue or press Cancel to dismiss the dialogue box.
Edit
The details of a job can be edited/modified by double-clicking an entry in the Job Cover table or selecting an entry in the Job Cover table then either pressing the Edit Booking button or right-clicking on the entry then selecting the Edit Booking menu item.
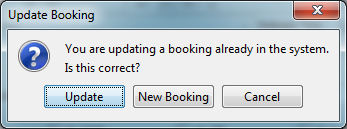
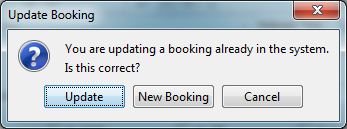
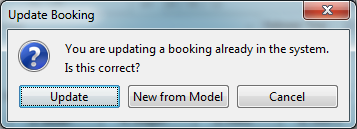
The booking dialogue will be displayed and populated with the details of the booking. The Operator may edit that booking then press F6 to update the booking. The Update Booking dialogue will be displayed.
The Operator is able to create a new booking, update the existing one or cancel any changes mad by pressing the appropriate button.
Copy Booking
If the copy booking button is pressed the booking dialogue will be displayed and populated with the details of the booking but it will be a new copy, not editing the selected booking. This allows the Operator to change any options or data if applicable and then create a new booking.
Cancel Booking
A job can be cancelled by double selecting an entry in the Job Cover table then either pressing the Cancel Booking button or right-clicking on the entry then selecting the Cancel Booking menu item.
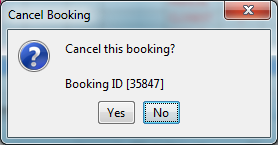
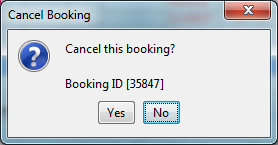
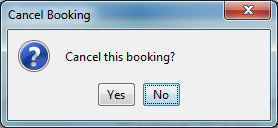
The Cancel Booking dialogue will be displayed asking for confirmation..
Press Yes to cancel the booking or No to dismiss the dialogue box. If the booking is cancelled, it will be moved to the Cancelled table.
Print Selected and Print All
Jobs in the table can be printed. This may be useful as part of the Call Centre’s backup procedures. Having a printed copy of pre-bookings may be useful in events such as the Centre losing its internet connection. To print all the pre-bookings press the Print All button. Certain jobs can be printed by selecting one or more rows using a combination of CTRL and SHIFT keys. When one or more entries are selected, the Print All button changes to Print Selected Booking(s). Press Print Selected Booking(s) to print the rows that were selected.
An example of the printed out put is shown below.
Check for Blacklist
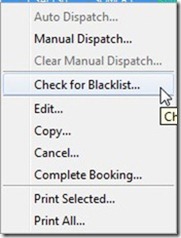
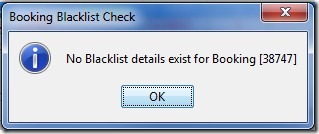
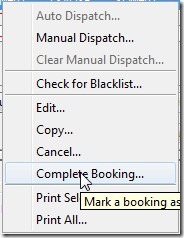
The right click menu shows a Check for Blacklist menu item. This allows bookings to be checked for blacklisting.
Complete Booking
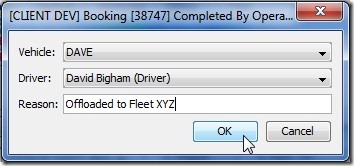
The right click menu shows a Complete Booking menu item if the Fleet Property Allow Bookings Marked Completed By Operator is set. Bookings that are on Job Cover, In-Progress (except Engaged) or Pre-Bookings are able to be marked as Complete by the Operator. This might be useful for offloading bookings to another fleet in busy times.
 Pre Bookings
Pre-Bookings are bookings for a future time and include ad-hoc pre-bookings such as taxi to the airport at 6am the next morning or regular pre-bookings such as school runs and regular doctor’s visits.
All jobs that are pre-booked are placed in the Pre-Bookings table. As soon as a pre-booked is placed in the Pre-Bookings table, the Pre-Bookings tab will be highlighted blue with the number of pre-booked jobs shown in parenthesis.
The description of the columns shown in the pre bookings table are the same as those described in the job cover tab. The only differences is that the “Q” and “P” columns are not shown and there is a “Date” column that shows the date of the booking.
The buttons below the pre bookings table are the same as the the job cover tab other than the “Queue” button described below
Queue
A pre-booked job may be put in the queue for immediate dispatching, i.e. an ASAP job. This may be done by selecting an entry in the Pre-Bookings table then either pressing the Queue Booking button or right-clicking on the entry then selecting the Queue Booking menu item.
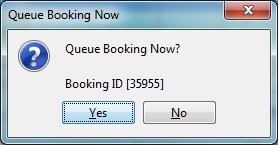
The Queue Booking Now dialogue will be displayed.
To immediately put the job onto the queue then press the Yes button or press Cancel to dismiss the dialogue box.
Note: Zone/layering algorithms will be applied to determine appropriate Vehicle to dispatch to.
 In Progress
When a booking is created by the Operator, it is put into the In Progress table. The job will be OFFERED to a particular Vehicle. If a job is not accepted by the Driver, it will be offered to the next vacant eligible Vehicle and so on until the system can not find one in which case the job will be put in the Job Cover table for any vacant eligible Vehicle to pick off cover.
If a job is accepted by a Driver, the Vehicle that will service the job will be flagged as being BOOKED and when the metre is engaged, the Vehicle will be flagged as being ENGAGED.
The table consists of 10 columns. Due to limited space, some column headings are abbreviated. These are described below:
- P: This indicates whether the booking is a pre booking or not. If it is it will show a
 icon and if it is an ASAP booking it will be blank
- Book #: shows the booking number of the job.
- Pickup Time: The pickup time requested fro the booking or the time the booking was created for ASAP bookings
- In Queue: shows the length of time a job has been in the queue. If a pre-booking is placed in the job cover queue, the time will have a negative value meaning the Client is not due to be picked up for that amount of time.
- Pickup: shows the address of the pickup location.
- Pickup Zone: shows the zone the job is located. If a zone could not be automatically be determined (e.g. out of town job) and was not be manually specified, this field will be blank.
- Destination: shows the address of the destination location, if one was specified.
- Destination Zone: shows the zone of the destination location, if one was specified.
- Attributes: shows what attributes the Vehicle must have to service the job, e.g. WAT, MAXI.
- Status: shows the status of the job. These can be:
- QUEUED: the job is queued to be dispatched to the next vacant eligible Vehicle.
- MANUAL: some constraints have been placed on the job, e.g. it has been manually dispatched to a particular Driver or Vehicle.
- CLOSEST: the job has “no location” specified. That is, the job will be dispatched to the closest Vehicle.
- OFFERED: the job has been offered to a Driver and is waiting for a response.
- Pass: shows the number of passengers the Client specified for the booking.
- Veh #: shows the Vehicle number that the job will be manually dispatched to, if applicable.
- Driver: shows the Driver that the job will be manually dispatched to, if applicable.
The columns can be sorted in ascending/descending order by clicking the column header. Clicking it a second time will sort the column in the reverse order.
The entries in the table will be highlighted in different colours depending on the status of the job:
|
Status |
Colour |
Comments |
|
OFFERED |
Dark cyan |
|
|
BOOKED |
Brown |
|
|
ENGAGED |
Blue |
Edit
The details of a job can be edited/modified by double-clicking an entry in the Job Cover table or selecting an entry in the Job Cover table then either pressing the Edit Booking button or right-clicking on the entry then selecting the Edit Booking menu item.
The booking dialogue will be displayed and populated with the details of the booking. The Operator may edit that booking then press F6 to update the booking. The Update Booking dialogue will be displayed.
The Operator is able to create a new booking, update the existing one or cancel any changes mad by pressing the appropriate button.
Copy Booking
If the copy booking button is pressed the booking dialogue will be displayed and populated with the details of the booking but it will be a new copy, not editing the selected booking. This allows the Operator to change any options or data if applicable and then create a new booking.
Cancel Booking
A job can be cancelled by double selecting an entry in the Job Cover table then either pressing the Cancel Booking button or right-clicking on the entry then selecting the Cancel Booking menu item.
The Cancel Booking dialogue will be displayed asking for confirmation..
Press Yes to cancel the booking or No to dismiss the dialogue box. If the booking is cancelled, it will be moved to the Cancelled table.
 Completed
The Completed tab shows all jobs that were completed since the Operator logged into the Dispatch Client (for the session). Initially, there will be none. For a complete list of completed jobs, the Operator may use the Search screen to view all completed jobs.
Jobs will be placed in the Completed table when a meter has been disengaged.
For Hail jobs, the system will recognise when the meter has been engaged/disengaged and will create a Booking number for that Hail job, with appropriate details including fare collected, and place it into the Completed table immediately.
The description of the columns shown in the completed table are mostly the same as those described in the in-progress table. The only differences is that the “In queue” and “Status” columns are not shown and the following columns are included:
- Completed: The time that the booking was completed
- Time Taken: The time taken to complete the booking.
The columns can be sorted in ascending/descending order by clicking the column header. Clicking it a second time will sort the column in the reverse order.
Copy
If the copy booking button is pressed the booking dialogue will be displayed and populated with the details of the booking but it will be a new copy, not editing the selected booking. This allows the Operator to change any options or data if applicable and then create a new booking.
Clear List
The Operator may clear all the jobs in the Completed table by either pressing the Clear Completed button or right-clicking on the table then selecting the Clear Completed menu item.
The Clear All Completed dialogue will be displayed asking for confirmation.
Press Yes to clear the Completed table or No to dismiss the dialogue box.
Note: clearing a large number of entries in the table may take some time. Please be patient.
 Action
The system utilises the mobile telephone networks and the internet to manage the dispatching of jobs to Vehicles. Sometimes, when the connection to the Vehicle is lost for extended periods due to network outages, some information is lost. More often than not, the system is capable of recognising network outages and is able to resume monitoring and dispatching of jobs as normal when the network comes back.
There are two situations were the system is may not be able to resume monitoring of jobs that are in progress. One is a Server restart and the other is loss of connection to the Vehicle for extended periods. If events happen during these to situations, the system may not know how to handle them. An example is a job is in progress for a particular Vehicle when the Server is restarted. During the time it takes for the Server to restart, the job has completed. After the Server starts, the system sees that the Vehicle is vacant and does not automatically know why.
In each case, the job that the system can not handle automatically will be placed in the Action table. The Action tab will be coloured yellow to grab the Operator’s attention.
The description of the columns shown in the completed table are mostly the same as those described in the in-progress table. The only differences is that the “In queue” and “Status” columns are not shown.
The columns can be sorted in ascending/descending order by clicking the column header. Clicking it a second time will sort the column in the reverse order. (potential bug with Time Taken column).
Requeue Booking
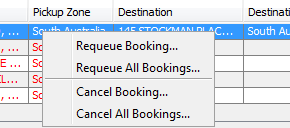
A job in the Action table may be put back in the queue for immediate dispatching, i.e. an ASAP job. This may be done by selecting an entry in the Action table then either pressing the Requeue Booking button or right-clicking on the entry then selecting the Requeue Booking menu item.
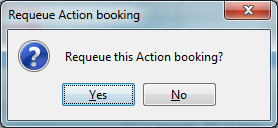
The Requeue Booking dialogue will be displayed.
To immediately put the job onto the queue then press the Yes button or press Cancel to dismiss the dialogue box.
Note: Zone/layering algorithms will be applied to determine appropriate Vehicle to dispatch to.
Requeue All Bookings
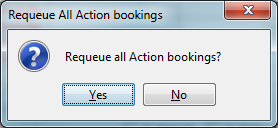
All jobs in the Action table may be put back in the queue for immediate dispatching, i.e. ASAP jobs. This may be done by either pressing the Requeue All Bookings button or selecting any entry in the Action table then right-clicking on the entry then selecting the Requeue All Bookings menu item.
The Requeue All Actions (Bookings??) dialogue will be displayed.
To immediately put all the jobs onto the queue then press the Yes button or press Cancel to dismiss the dialogue box.
Note: Zone/layering algorithms will be applied to determine appropriate Vehicles to dispatch to.
Cancel Booking
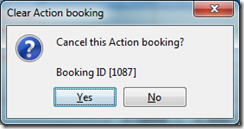
The Operator may cancel a job in the Action table if the job is no longer valid or necessary. This may be done by selecting an entry in the Action table then either pressing the Cancel Booking button or right-clicking on the entry then selecting the Cancel Booking menu item.
The Cancel Action dialogue will be displayed.
To remove the job from the Action table press the Yes button or press Cancel to dismiss the dialogue box.
Cancel All Bookings
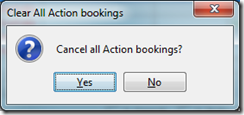
The Operator may clear all jobs in the Action table if the jobs are no longer valid or necessary. This may be done by either pressing the Cancel All Bookings button or selecting any entry in the Action table then right-clicking on the entry then selecting the Cancel All Bookings menu item..
The Cancel All Actions dialogue will be displayed.
To remove all the jobs from the Action table press the Yes button or press Cancel to dismiss the dialogue box.
Note: clearing a large number of entries in the table may take some time. Please be patient.
 Cancelled
Bookings that have been cancelled by any Operator for a Fleet will be placed in the Cancelled table. Only bookings that have been cancelled since the Operator logged into the Dispatch Client (for the session) will be shown. For a complete list of cancelled jobs, including details of what stage the job was cancelled or which Operator cancelled the job may be viewed using the Search screen or via the Job Details area.
The description of the columns shown in the completed table are mostly the same as those described in the in-progress table. The only differences is that the “In queue” and “Status” columns are not shown.
The columns can be sorted in ascending/descending order by clicking the column header. Clicking it a second time will sort the column in the reverse order.
Clear List
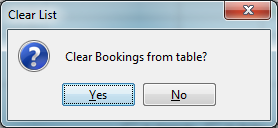
The Operator may clear all jobs in the Cancelled table if the jobs are no longer valid or necessary. This may be done by either pressing the Clear List button or selecting any entry in the Cancelled table then right-clicking on the entry then selecting the Clear List menu item.
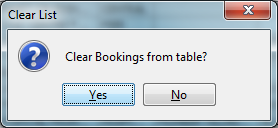
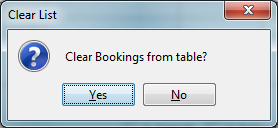
The Clear List dialogue will be displayed.
To remove all the jobs from the Cancelled table press the Yes button or press Cancel to dismiss the dialogue box.
Note: clearing a large number of entries in the table may take some time. Please be patient.
Copy
If the copy button is pressed the booking dialogue will be displayed and populated with the details of the booking but it will be a new copy, not editing the selected booking. This allows the Operator to change any options or data if applicable and then create a new booking.
 No Shows
When a Vehicle arrives at a job’s pickup location and the Client is not present, the Driver will “No Show” the job. This will place the job in the NoShows table. The job will be flagged as completed. Along with the number of “No Shows”, the NoShow tab also display the percentage completed jobs that were “No Shows”. A high percentage may indicate inherent issues that need addressing, e.g. no Driver is wiling to pickup from a particular address that’s hosting a party.
The description of the columns shown in the completed table are mostly the same as those described in the in-progress table. The only differences is that the “In queue” column is not shown.
The columns can be sorted in ascending/descending order by clicking the column header. Clicking it a second time will sort the column in the reverse order.
Note: The Driver is not penalised for “No Showing” a job and the Vehicle will get its queue position back. This may lead to exploitation by the Driver when they want to “Stack” up on jobs. The Fleet Management website has comprehensive reporting functionality that may combat this.
Clear List
The Operator may clear all jobs in the Cancelled table if the jobs are no longer valid or necessary. This may be done by either pressing the Clear List button or selecting any entry in the Cancelled table then right-clicking on the entry then selecting the Clear List menu item.
The Clear List dialogue will be displayed.
To remove all the jobs from the NoShow table press the Yes button or press Cancel to dismiss the dialogue box.
Note: clearing a large number of entries in the table may take some time. Please be patient.
Copy
If the copy button is pressed the booking dialogue will be displayed and populated with the details of the booking but it will be a new copy, not editing the selected booking. This allows the Operator to change any options or data if applicable and then create a new booking.
 Model
Model
The model booking table shows all of a fleets model bookings. These are bookings that can be used as templates for bookings the are commonly used. Examples might be for regular bookings from clubs, hospitals or school pickups.
The table consists of 14 columns. Due to limited space, some column headings are abbreviated. These are described below:
- Book #: shows the booking number of the model booking. This number may be used in some locations (e.g. booking posters) to refer to the model booking
- Model Type: The type of model booking. Currently the only option is “FAVOURITE”.
- Time: The pickup time that any booking created from this model booking will be set for. This may be ASAP.
- Account: The fare payment account that will be set for any booking created from this model booking.
- Pickup: shows the address of the pickup location for the booking.
- Zone: shows the zone the pickup location of the booking is located. If a zone could not be automatically be determined (e.g. out of town job) and was not be manually specified, this field will be blank.
- Destination: shows the address of the destination location, if one was specified.
- Pass: shows the number of passengers specified for the booking.
- Type: shows what attributes the Vehicle must have to service the job, e.g. WAT, MAXI.
- Veh #: shows the specified vehicle that the job will be manually dispatched to, if applicable.
- Driver: shows the specified driver that the job will be manually dispatched to, if applicable.
- Fare: Shows any fixed fare amount applicable to bookings created from this model booking
- Client Name: The name of the client that will be set from any bookings created from this model booking.
- Client Phone: The phone number of the client that will be set from any bookings created from this model booking.
The columns can be sorted in ascending/descending order by clicking the column header. Clicking it a second time will sort the column in the reverse order.
The following describes the functionality available from the buttons below the model booking table.
Manual Dispatch
The Operator is able to specify a specific vehicle or driver for any bookings created from a model booking by selecting an entry in the table then either pressing the Manual Dispatch button or right-clicking on the entry then selecting the Manual Dispatch menu item.
The Manual Dispatch dialogue will be displayed. This dialog shows a small table with a list of vehicles and some useful information on those vehicles. The information can be used to help deciding which vehicle to manually allocate the booking to. The table can also be used to show a list of drivers so that the booking can be allocated to a driver instead. Note that only drivers currently logged in will be shown in the driver list.
For jobs with specific criteria, only Vehicles that satisfy that criteria will be listed, e.g. for WAT jobs, only WAT Vehicles will be listed. Press OK to dispatch the job manually to the selected Vehicle or press Cancel to dismiss the dialogue box.
Clear Manual Dispatch
Sometimes a manually dispatched job may need to be cancelled, e.g. the Driver that accepted the job had an accident and can no longer do the job. The Operator is able to clear manually dispatched jobs by selecting an entry in the Job Cover table then either pressing the Clear Manual Dispatch button or right-clicking on the entry then selecting the Clear Manual Dispatch menu item. The Clear Manual Dispatch dialogue will be displayed.
The Operator can press Yes to cancel the manually dispatched job, which will put that job back onto the cover queue or press Cancel to dismiss the dialogue box.
Edit
The details of the model booking can be edited/modified by double-clicking an entry in the Job Cover table or selecting an entry in the Job Cover table then either pressing the Edit button or right-clicking on the entry then selecting the Edit menu item.
The booking dialogue will be displayed and populated with the details of the booking. The Operator may edit that booking then press F6 to update the booking. The Update Booking dialogue will be displayed.
The Operator is able to create a new model booking, update the existing one or cancel any changes mad by pressing the appropriate button.
New from Model
If the New from Model button is pressed the booking dialogue will be displayed and populated with the details of the model booking. This allows the Operator to create the booking using the model booking as the starting point then change any options or data if applicable.
Cancel
A job can be cancelled by double selecting an entry in the Model table then either pressing the Cancel button or right-clicking on the entry then selecting the Cancel menu item.
The Cancel dialogue will be displayed asking for confirmation..
Press Yes to cancel the booking or No to dismiss the dialogue box. If the booking is cancelled, it will be moved to the Cancelled table.
Job Matrix
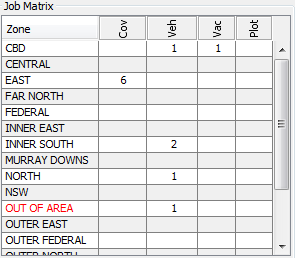
The job matrix panel is located on the top right of the dispatch tab. This displays a quick summary of the state of bookings and vehicles available for work. This is generally used by operators if they need to be able to see if there are any vehicles close or plotted to areas where there is an excess of work. If the numbers are too far skewed then they may need to encourage vehicles to move to those areas.
The columns in the job matrix have the following meaning:
- Zone: The name of the zone that the other statistics relate to.
- Cov: The number of cover jobs that are waiting in the zone
- Veh: The total number of vehicles currently in the zone that are currently connected to the server (i.e. would not include disconnected vehicles).
- Vac: The current number of vehicles in the zone that are vacant and available.
- Plot: The number of vehicles that are plotted to go to that zone.
Booking Details
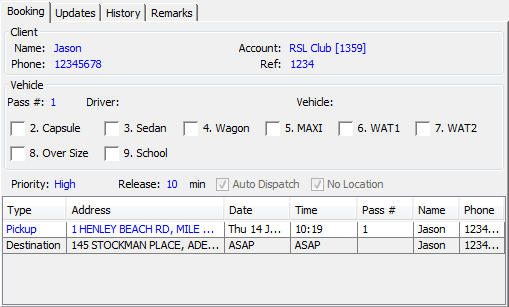
The booking details panel is shown in the bottom left of the dispatch tab. This panel will show the details and data for the booking that is selected in the jobs list. The tabs and description of this tab is the same as the same panel in the search tab and is described in detail in the documentation in that section.
Vehicle Status
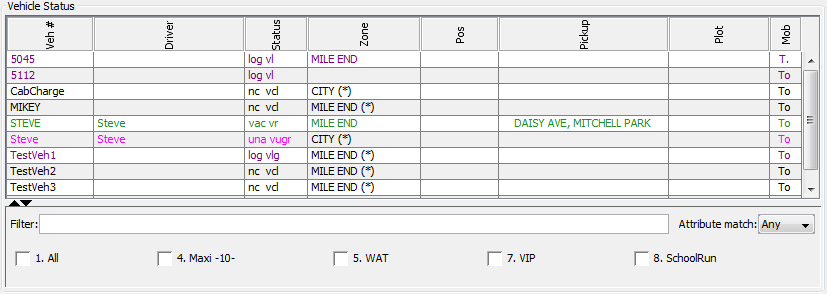
The area displays a table that provides instantaneous information on the status of the Drivers and Vehicles within the Fleet. It also allows the Operators to perform certain administrative tasks on the Vehicles remotely.
The table consists of 8 columns. Due to limited space, some column headings are abbreviated. These are described below:
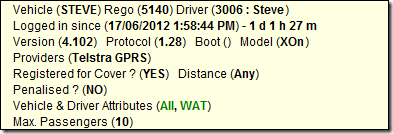
- Veh #: shows Vehicle. Hovering the mouse cursor over the Vehicle number will display a tool tip with a summary of the status of that Vehicle. This can contain quite a lot of information and is described in more detail below. This column has more information available if the mouse is moved over the text in this cell (see below)
- Driver: shows the name of the Driver that’s logged into the Vehicle.
- Status: shows the status of the Vehicle. Please refer to tables below for more detail on the statuses and flags. This column has more information available if the mouse is moved over the text in this cell (see below)
- Zone: shows the zone the Vehicle is currently in. If a (*) appears next to a zone, it means that the GPS from the Vehicle has not reported a good position for the last 3 minutes. It is then assumed that the Vehicle is in the last known good zone. If a (o) appears next to a zone, it means that the operator has manually set the zone for the Vehicle. The colour of the zone text is usually the colour of the status of the booking. In the case where the text is black the reason is that the system is not certain that the car is in that zone. This may be due to invalid GPS data being received/processed, but should sort itself out shortly after.
- Pos: shows what queue position the Vehicle has within the zone it is in.
- Pickup: shows the address of the pickup location. This field will be empty for Hail jobs. This column has more information available if the mouse is moved over the text in this cell (see below)
- Plot: shows the zone the Vehicle has indicated it will be in at the end of a job. The system will hold a job in that zone for a car that has plotted to that zone for up to 30 minutes. The system will not offer the job to other Vehicles in adjacent zones. If multiple Vehicles plot to the same zone, the Vehicle that enters that zone first will be offered the job. This column has more information available if the mouse is moved over the text in this cell (see below)
Note, the job will be released to other Vehicles if
1. The Vehicle that has plotted drops off a passenger (disengages the meter) outside of the zone it has potted to.
2. The Vehicle travels through the zone into another without dropping off the passenger. - Mob: shows the First letters of the mobile telephone networks that the Vehicle can utilise, with the current one in use capitalised.
Note: If the second network shows a “.” This implies that either there is no second SIM card installed or the second SIM card could not be read. Forcing a manual switch over will force the Vehicle to attempt to read the card again.
For example the main networks in use in Australia include:- T: Telstra
- V: Vodafone
- O: Optus
The columns can be sorted in ascending/descending order by clicking the column header. Clicking it a second time will sort the column in the reverse order.
If the mouse is moved over the text of a cell in the “Pickup” column, a little dialog will appear that indicates the booking number that relates to the pickup location for that vehicle and whether it was an ASAP job or not.
If the mouse is moved over the text of a cell in the “Plot” column, a little dialog will appear that indicates how long the vehicle has been plotted for.
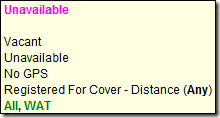
If the mouse is moved over the text of a cell in the “Status” column, a little dialog will appear that explains the status in a more verbose fashion.
The entries in the table will be highlighted in different colours depending on the status of the job. As well as the colour coding the letters in the status column below will be shown as the first few letters in the Status column of the Vehicle status table.
|
Colour |
Status |
Comments |
|
Black |
nc |
Vehicle is not connected to system |
|
Red |
pan |
The panic button has been pressed |
|
Pink |
lck |
Driver has been Dispatch locked. |
|
Pink |
pen |
Driver is being penalised. |
|
Blue |
eng |
Vehicle is engaged and the meter is “ON”. |
|
Brown |
bkd |
Vehicle is booked for a job. |
|
Purple |
log |
Driver is logged out. |
|
Pink |
una |
Driver is unavailable for work. |
|
Dark Slate Grey |
loc |
No valid GPS location from the Vehicle. The Vehicle will continue to receive work from its last known zone. |
|
Green |
vac |
The Vehicle is vacant and eligible for jobs. |
The status column will contain additional flags to provide more information. The table below explains what those flags mean:
|
Flag |
Comments |
|
b |
Vehicle is booked. |
|
e |
Vehicle is engaged. The Meter is on. |
|
v |
Vehicle is vacant. The Meter is off. |
|
r |
Driver has registered for cover work. |
|
c |
Vehicle is NOT connected to system. |
|
p |
Driver has pressed the panic button. |
|
l |
Vehicle is NOT logged into the system. |
|
u |
Vehicle is connected and logged into the system. The Driver has logged in but is unavailable. |
|
g |
Vehicle is connected and logged into the system but does NOT have a valid GPS location. |
|
x |
Driver has been penalised. |
|
k |
Driver has been dispatch locked. |
|
o |
Driver is out of car. |
The following is an example of the dialog that appears if you move the mouse over the hover over the “Veh #” column. This describes the current state of the vehicle including ID, rego, driver, software and hardware versions, carrier. It also includes the vehicle capabilities and which attributes and cover status is currently selected.
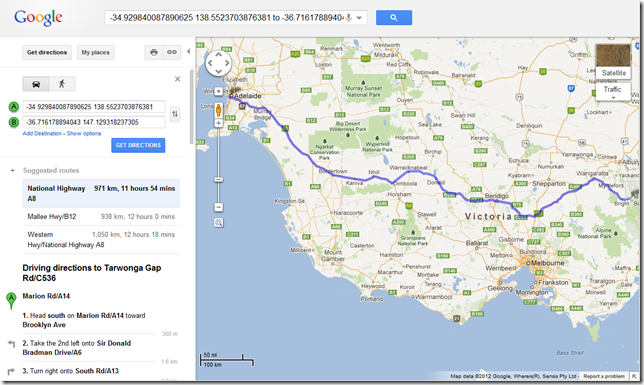
Double-clicking a Vehicle in the table will display a Google Map showing the position of the Vehicle. If the status of the Vehicle is Booked, the map will additionally show the route to the pickup location.
Vehicle Status Context Menu
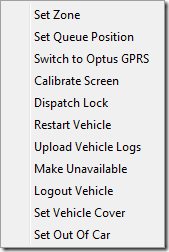
Right clicking on a row in the vehicle status table will bring up a menu that will allow you to perform a number of things to that vehicle. The options that appear on that list may change depending on the authority given to the user and the state that the vehicle is in at the time. Each of the items of functionality is described more below.
Clear Penalty
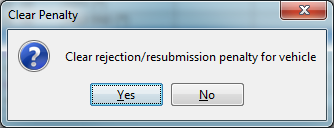
The Operator may clear a penalty that’s been imposed on a Driver. This may be done by selecting an entry in the Vehicle Status table then right-clicking on the entry then selecting the Clear Penalty menu item. The Vehicle’s queue position will remain unchanged. A confirmation dialog will confirm this change.
Clear Penalty & Top of Queue
In certain circumstances, the Operator may clear a penalty that’s been imposed on a Driver and set their queue position back to the top. This may be done by selecting an entry in the Vehicle Status table then right-clicking on the entry then selecting the Clear Penalty & Top of Queue menu item. A confirmation dialog will confirm this change.
Set Zone
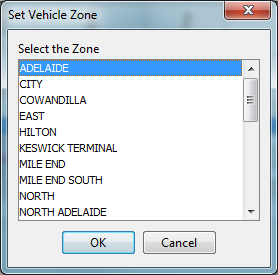
In the event a Vehicle loses GPS position, the Operator manually set the zone the Vehicle is in so that the Vehicle may still be dispatched jobs. The Operator may do this by selecting an entry in the Vehicle Status table then right-clicking on the entry then selecting the Set Zone menu item.
Once a Vehicle reobtains GPS position, the zone the Operator manually set will be overridden.
Set Queue Position
The Operator may manually set the queue position of a Driver. Occasions where the Operator will do this include the giving a queue position back to a Driver who rejected a job for a valid reason. The Operator may set a queue position by selecting a Driver in the Vehicle Status table then right-clicking on the entry then selecting the Set Queue Position menu item.
Note: if a Driver has rejected a job a certain number of times, the job will not be offered to that Vehicle again. This number is a Fleet setting.
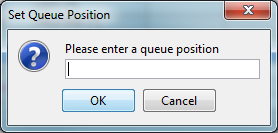
The Set Queue Position dialogue will be displayed.
Enter a number representing the queue position to set the Driver to the press the OK button or press Cancel to dismiss the dialogue box.
Note: entering a number higher than the current lowest queue position for the zone will set the Driver’s queue position to the bottom of the queue.
Note: if a Driver makes themself unavailable, they will get their queue position back if they make themselves available again before a time limit. This time limit is a Fleet setting.
Note: if a Vehicle disconnects then reconnects before a time limit, the Driver will get their queue position back. This time limit is a Fleet setting.
Switch to [Network] GPRS
If supported on the hardware (i.e. if the hardware has dual SIM’s) the Operator may force the devices in the Vehicles to switch from one network to another if there is a problem with one. The Operator may do this by selecting a Vehicle in the Vehicle Status table then right-clicking on the entry then selecting the Switch to Network GPRS menu item where Network is the currently not used network.
The Vehicle will be disconnected (as indicated by its status) for up to 60 seconds before it come’s back online.
Calibrate Screen
Some hardware devices in the Vehicles may lose calibration over time. The Drivers may calibrate the touch screens themselves but on occasion where the Drivers are unable to press buttons on the touch screen, the Driver may request an Operator to send a command to the device which will run the calibration program. The Drivers may then continue with the calibration process. The Operator may send the command to run the program by selecting a Vehicle in the Vehicle Status table then right-clicking on the entry then selecting the Calibrate Screen menu item.
The Calibrate Screen dialogue will be displayed. Press Yes to calibrate the Vehicle’s device or No to dismiss the dialogue box.
Dispatch Lock
A Driver may be excluded from being dispatched jobs for reasons outlined in this document. The Operator may dispatch lock a Driver by selecting a Driver in the Vehicle Status table then right-clicking on the entry then selecting the Dispatch Lock menu item.
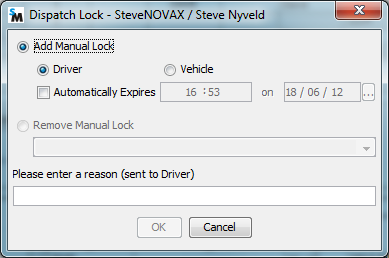
The Dispatch Lock dialogue will be displayed asking the more information on the dispatch lock. This includes the ability to lock a vehicle or driver, the time to expire (if applicable) and a reason for the dispatch lock that is sent to the driver. Enter a reason then press OK to dispatch lock the Driver Cancel to dismiss the dialogue box.
Restart Vehicle
The Operator may assist a Driver to restart their devices should the devices fail to respond to the Driver’s touches. This is only available on MDT hardware. The Operator may restart the devices by selecting a Vehicle in the Vehicle Status table then right-clicking on the entry then selecting the Restart Vehicle menu item.
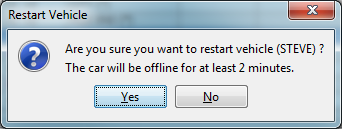
The Restart Vehicle dialogue will be displayed asking the Operator to confirm they want to restart the Vehicle. Press Yes to restart the devices on the Vehicle or Cancel to dismiss the dialogue box.
Note: it may take up to 2 minutes to restart the devices in the Vehicles.
Note: the Driver will see a message on their screens indicating the device will be restarted shortly. The Driver may cancel the restart.
Upload Vehicle Logs
The logs for a vehicle can be sent to support via email for analysis.
Note that this could take up to 1MB of data to send and needs to be taken into account with respect to any data caps for devices.
Note that logs will only be analysed if they are also associated with a support request via email to explain in more detail what the issue was and how to reproduce any problem.
Make Unavailable
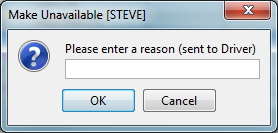
If the driver is currently available the Operator can make them unavailable using this option. A dialog will appear that requests a reason from the Operator and this is sent as a message to the vehicle.
Make Available
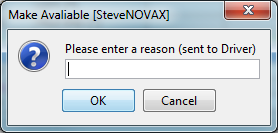
If the driver is currently logged in but unavailable the Operator can make them available using this option. A dialog will appear that requests a reason from the Operator and this is sent as a message to the vehicle.
Logout Vehicle
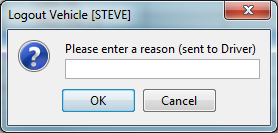
If the driver is currently logged in the Operator can make log them out using this option. A dialog will appear that requests a reason from the Operator and this is sent as a message to the vehicle.
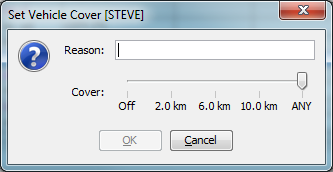
Set Vehicle Cover
The operator can change the cover setting and distance of a driver that is currently logged using this option. A dialog will appear that requests the new setting and a reason from the Operator and this is sent as a message to the vehicle.
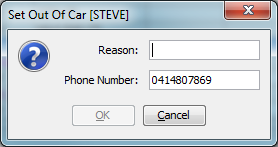
Set Out Of Car
The operator can change the cover out-of-car setting of a driver that is currently logged using this option. A dialog will appear that requests the contact phone number and a reason from the Operator and this is sent as a message to the vehicle.
Vehicle Status Filter
Below the vehicle status table is a filter that can be used to help find vehicles if there is a very large list of vehicles in the table.
The “Filter” field will filter the vehicle list to only show rows where one of the cells contains the same text as the filter text. Partial matches are accepted.
A list of the booking attributes available are shown in rows with checkboxes next to them. If the attributes are checked the list will only contain vehicles that have those attributes. If the attributes have a cross in them the list will contain vehicle that have the “NOT” of that attribute. The drop down “Match” indicates whether the search should use “any” of the attributes or “all” of the selected attributes.
