Overview
The vehicle configuration page provides the fleet manager with the ability to change properties and data about the vehicles in the fleet. To display the vehicle information the appropriate fleet first needs to be chosen using the drop down list. Once a fleet is chosen then the vehicle can be chosen from the vehicle selector type ahead field. The “Display Properties” button should then be pressed.
Once the data for the vehicle is retrieved a number of tabbed pages of information is then displayed. Each of the tabs is described in more detail in the sections below.
Properties Tab
This displays all of the properties that can be set for the vehicle. There are a large number of properties available and the detail on what each one represents is given at this link.
Properties shown in the table can be searched, exported or printed as they can in any of the standard tables.
If you hover over the property name or value you will see a description of that property including the original fleet default value.
You can edit the property value by clicking the line in the value table. A small dialog box will be shown and depending on the type of property you are editing you will have either a text box or a drop down list of options to choose from. Click the ![]() to accept the value or the
to accept the value or the ![]() button to cancel the edit. After editing the value it will be shown in green in the table. At this point the property has not been saved. To save this value for your fleet you will need to click the “Save” button at the top of the table. Clicking “Cancel” will cancel any changes you have made.
button to cancel the edit. After editing the value it will be shown in green in the table. At this point the property has not been saved. To save this value for your fleet you will need to click the “Save” button at the top of the table. Clicking “Cancel” will cancel any changes you have made.
The “Note” column shows whether the fleet default setting is being used for this vehicle or not. If an override has been set then the not section will either be blank or indicate a warning that the vehicle setting could be overridden by a driver override on this setting (this depends on the fleet override setting for that property).
To view the history of changes for a particular property (i.e. who and when it was changed) click on the ![]() icon for the appropriate property.
icon for the appropriate property.
Vehicle Attributes Tab
The vehicle attributes tab allows the attributes that are required for this vehicle to be added or removed. The current list of attributes for the selected vehicle is shown in the table.
To remove an attribute you will need to click the “delete” item in the appropriate row and then confirm the delete. To add an attribute to the vehicle you will need to click the “Add Attribute” button at the top of the table. This will bring up a dialog with a drop down list of the attributes that have not already been added to the vehicle. Select one of these and click the “Save” button to add the attribute. You will only be able to add attributes that are active for a vehicle in the fleet configuration attributes screen.
Vehicle Requirements Tab
The vehicle requirements tab allows you to view or edit the requirements for this vehicle. The current list of requirements enforced by the fleet for this vehicles will be shown in the table with a summary of the relevant information including the expiration data and number of days to go if relevant.
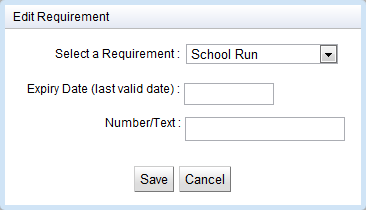
When a requirement is added or edited a dialog box will be shown that will allow the data for that vehicle and requirement to be specified. The fields that are shown will depend on the requirement selected in the drop down field at the top. To save the changes press the “Save” button. You will only be able to add or edit requirements that are specified for a vehicle in the fleet configuration requirements screen.


